September 29, 2012

Spiced Peach Jam

Vintage clothes, furniture and recipes are some of my favorite things. I hate the idea that once something is past it's peak of popularity it fades away to be forgotten or just simply a distant memory. I thought of this again recently when cleaning some junk out of the attic at my mom's house. I came across a canning and food preserving recipe book from 1966. It was full of great recipes and instructions on food preservation. Some of the methods were a little outdated but still interesting to see how things have changes in the last 50 years.


I came across a no-pectin recipe for peach jam. I had been wanting to make some peach jam for the last few months and the local organic peaches were finally ripe! I noticed a note under the instructions for this jam stating to add some cinnamon to make it a spiced peach jam. I did not have just cinnamon sticks and read that cinnamon powder can make the jam turn kind of brown. However...I did have some left over mulling spices from last winter that worked even better!


Spiced Peach Jam
2 Quarts (About 10 large peaches)
1/2 C Mulling Spices (Whole)
6 C Sugar
1/2 C Water
Cheese cloth and twine for tying up mulling spices

Over lap two piece of cheese cloth and place mulling spices in the center. Tie cheese cloth into a pouch cinched tight. ( I left long tails of twine on mine to be able to tie to the handle of the pot but it is not necessary)


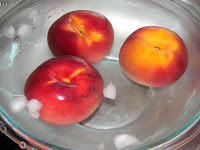
Blanch peaches to easily remove the skins.


Peel and remove pit.
Cut into smaller pieces.


Mash or puree peaches until there are few chunks of fruit left.


Pour into a large high sided pot. Add water and mulling spice bag. Cook on medium high heat for 10 minutes bring to a boil.


Slowly stir in sugar until dissolved. Bring to a rolling boil and cook for 15 minutes. Stir frequently to avoid sticking to pan and burning. Once done, you can discard the mulling spices.


Fill hot jars, place on lid then process in boiling watch bath for 5 minutes. Remove from water bath and set aside to cool at room temperature.


Once jars have sealed they can be store at 60-70 degrees for about 18-24 months. The color may darken but the taste should not change.


~Connect with me ~


Twitter: CheeCheeAndCo

Facebook : Chee Chee and Company

September 24, 2012

Breakfast Casserole

Me: Hey honey... what do you want for dinner?
My husband: Uh, what do we have?
Me: Ummm, well...uhh...how do you feel about breakfast?

I played it safe, knowing very well he never turns down breakfast. This is usually how dinner planning goes at my house. When it is getting to the point when it is slim pick-ins in the refrigerator we usually just throw some random stuff together. This is how the breakfast casserole came to be. It always starts the same basic way; vegetable, starch and protein. To our surprise this one came out pretty well. You can make to same basic thing just changing the filling for what ever you happen to have.


Breakfast casserole
4 Eggs
1/2 C Milk
Salt / Pepper
1 C Sliced yellow squash
2 Hot links (Sausage) Cooked
1/2 C Cheese of choice
2-4 Pieces of bread (it is ok if a little stale)


Cut up sausage and squash then set aside. Whisk together eggs, milk and spices. Stir in cheese, sausage and squash then pour into an oven safe dish. Cut or tear bread into 1-2 inch pieces then layer on top of mixture. Lightly press down on bread to help absorb some of the liquid into the bread.

Bake at 400 degrees for 40-50 minutes.
(Time and temperature may vary depending on your oven. Bread should be toasted to a golden brown and middle will be firm, not runny)

~Connect with me ~
Twitter: CheeCheeAndCo
Facebook : Chee Chee and Company

September 20, 2012

Whole Wheat Zucchini Bread

It has been almost a year since I made zucchini bread last and oh how I have missed it. Last year I froze some zucchini with the intentions of  making bread through out the year. Instead it got used in things like pasta sauce, a great way to hide vegetable from those who don't like them. So I have been longing for some nice warm zucchini bread with a touch of butter on it. Last time I made zucchini bread I used my grandmother's recipe. This time around I am using the same basic recipe but a little more my style. I plan to freeze the bread this year!


Whole Wheat Zucchini Bread
   3 Eggs
   2 C Evaporated Cane Sugar
   1 C Vegetable oil (Canola or Safflower is best)
   1  t Vanilla
   2 C Whole wheat flour
   1 C White flour
   1  t  Salt
   2  t  Cinnamon
   1  t  Soda
1/4  t  Baking Powder
   2 C Zucchini (Shredded)

Cream together eggs, sugar, oil and vanilla. In separate bowl sift together the flours, salt, baking powder, baking soda and cinnamon. Combine wet and dry ingredients.

Squeeze as much water as possible from zucchini then add to batter.

Preheat oven to 325 degrees. Divide batter into two greased loaf pans or five mini loaves.

Bake for 40 minutes.

***Note - If you would rather use a muffin pan, adjust bake time to 25 minutes***


Our family likes to eat zucchini bread  plain, with butter and even with honey butter. To make your own just add 2 T honey to 1/2 C of soft butter. Try it out before all the zucchini are done for the year!

 
~Connect with me ~
Twitter: CheeCheeAndCo
Facebook : Chee Chee and Company
September 19, 2012

Plastic Bag...Bag

Mother necessity reared her head once again in our household! We recently moved and we seemed to take all of our plastic grocery bags with us. At one point I was working on melting them together to make a new reusable bag. It was pretty cool, but seemed to be a lot of work and not much stronger then a single plastic bag. I have since just made more fabric grocery bags instead (I will have to do a tutorial on that another day). So sat all the plastic bags I have collected over the last couple years. We do reuse them for waste cans and dog poop but don’t really have a good place to store them. This sparked the idea to make a holder for them.
Bag dispensers are nothing new but I wanted to make something fun and that looks nice for storage.  Below is a link to my Web site tutorial on what I did if anyone is interested in making a bag. If you are not sewing inclined, below is also link to my store. Enjoy!
 
~Connect with me ~
 
Store : Chee Chee And Company
 
Twitter: CheeCheeAndCo
Facebook : Chee Chee and Company


September 16, 2012

Bacon lovers potato cakes

This weekend my sister came to visit. In true fashion we made food that was oh so good! Yesterday it was Fall Meat loaf  (new blog coming soon!) and today it was potato cakes for breakfast. So for my first guest recipe I introduce my sister Rebecca's, Bacon Lover's Potato Cakes!


Potato Cakes
1 1/2 C Mashed potatoes (We used left over garlic mashed potatoes but any are fine)
   1/2 C Crispy bacon bits
      1 C Chopped spinach
   1/4 C Flour
   1/4 C Parmesan cheese
   1/4 C Mayonnaise
      2 Eggs
    1/2 t Black pepper

 For coating:
      1 C Bread crumbs (Plain or seasoned)
   1/2 C Flour
       1 t Italian seasoning (optional)

Cook bacon then drain grease and remove bacon. Add spinach to same pan and sautee`. Set aside to cool when done.

In separate bowl add potatoes, cheese, flour, egg, mayo and seasonings. Mix together then fold in bacon and spinach.

In shallow dish combine bread crumbs, flour and Italian seasoning for the coating.

Drop about a 1/4 of a cup of the potato mixture into the coating and shape into a 3" diameter patty. Pressing crumbs into the patty gently.

Coat frying pan with vegetable based oil and butter (50/50) then bring to temperature on medium/high heat. Drop potato cake into oil to cook for 3 minutes on each side or until golden brown.

Try topping with egg, sour cream or more bacon! Now EAT!!!

***Note: If potato cake is not hot in the middle but brown,
you may want to cook for a little while longer to ensure the egg is cooked all the way.***

September 07, 2012

The Almighty Blackberry

As the summer comes to a close, I look back on all the fun times I've had with blackberries. From getting ambushed by a thug of vines retaliating for taking pounds of their precious fruit to figuring out the best ways to preserve there goodness. I love berries and they will be missed until next summer!


Here are a few things I did with the berries I picked this summer:

Freeze - To freeze berries first wash and dry them thoroughly. After you have done so spread them out evenly on a pan covered with parchment or wax paper. Place in freezer until berries are frozen all the way through. Now you can pour them into a container or vacuum seal them to keep in the freezer until you are ready to use. Frozen berries are great to snack on as is or you can make them into a smoothie, pie or cobbler.

Four trays full of berries to about 12 hours
on medium heat for my dehydrator

Left - Before, Right - After


Dehydrate - When dehydrating berries make sure to wash and dry first them place evenly on a tray. It make take several hours depending on your dehydrator.

Jam - I made about 4 batches of blackberry jam this summer. After doing so I realized seedless is by far the best. Blackberries have such large seeds that they can really get in the way or be hard to bite into. I tried straining out the seeds from half of one of the batches but it took a very long time and did not seem to make that much of a difference. I did make one batch of seedless and was very pleased with how it turned out.


To do so I poured all the berries into my juicer instead of straining them. This got out every single seed and smoothed out the pulp of the berry so much it did not really have any chunks left. I did not filter the berries any more then what the juicer did for me but it worked perfect. The left over puree we ended up pouring over some ice cream and enjoyed it just like that!


Do you want more blackberry blogs? Check out this cobbler!

Visit our website Chee Chee and Company

Oh so good blackberry cobbler

After a hard two hours of picking blackberries with a good friend we decided to make a cobbler. I could not remember a time when I had ever made a cobbler. I enjoy eating it from time to time but never made one myself. We researched the basics then came up with this receipe.


Blackberry Cobbler
   5  C Blackberries          1/2 C Boiling water
   2  C Flour                                  2 T Cornstarch

   2  C Sugar                   1/4 C Cold water

   2  t Baking powder          1 T Lemon juice

   1  t Salt 
 12  T Cold butter


Preheat oven to 400 degrees. Mix together the flour, 1 of cup sugar, baking powder, and salt. Cut in butter until crubbly. Slowly add in 1/2 cup boiling water until topping comes together evenly.

In a large pan dissolve the cornstarch in cold water. Mix in remaining 1 cup of sugar and lemon juice. Bring to a soft boil and add berries. Making sure berries get evenly coated.

Pour berries into a 9X13 glass baking dish. The drop spoonfulls of the topping on the berries.You can also sprinkle some more sugar on top if you would like.

Bake at 400 degrees for 25 minutes until dough is golden brown. Let cool a little then enjoy!


Want more? Check out our website Chee Chee and Company

September 06, 2012

Roasted Pepper Salsa

In our home we love spicy and Mexican inspired food. This last weekend my husband brought home some peppers from a family friend straight from there garden. We are drying some to use later and the others I roasted for salsa!

When roasting veggies make sure they are clean and dry. I set my oven to broil and placed the peppers and garlic on a cookie sheet then drizzled Safflower oil on them (You can use any type of vegetable oil). I shook the pan around a bit so the peppers were evenly covered then placed in the oven. Make sure to keep an eye on the peppers, they will darken rather quickly. When they start to blister and get darker they are ready.

 
Roasted Pepper Salsa
4 Medium size tomatoes
2-3 Peppers of your choice
1 C Onion
4 cloves of garlic
salt to taste (optional)


I roughly cut all my vegetables then put them in the food processor. If you you want a chunky salsa you can just dice everything by hand or do not process for too long.

After making it I think lime and cilantro would have been a great addition and maybe more peppers. The beauty of salsa is you can make it how ever you want it and it still comes out good. Give it a shot and see what you think!