December 03, 2013

New house! New house!

"A new house! Going to the new house!" My son excitedly says every time we go home. Our home! After 9 long months of looking at houses, almost buying one then it falling through...we finally found our new home! We are so happy and thankful we were able to find a house that is where we are are supposed to be. This has definitely been a test of patients and humility. In the long term view, it was just a few months with many ups and downs . We have a lot of work to do before we get the house they way we want it and functioning smoothly inside and out. We plan on updating a little at a time, planting as much food as we can handle and making a fun and loving home for our family. 

I am excited to try as many projects with little to zero money. Not just because we don't have much to spend but I feel very strongly about reusing materials, collecting free materials that would otherwise be garbage or sit wasting away. I might not be able to afford to drive a hybrid yet or add a windmill or solar panels to my roof, but this is good way to start being a better human!

I love getting up early and watching Zion (our dog) run through her yard and stare at the animals across the street. We have a neighbor with chickens and ducks and another with llamas. We already feel like this is the place God has planned for us to be. Even before we moved in. I know we will be used at this location and I can't wait!

We have many projects coming and the list grows everyday. We know we can't do everything but we plan to continue to work to make this our home each day! Once we finish unpacking I will post some pictures and videos. Keep and eye out on the HandMadeByKristen YouTube channel for more how to videos, progress updates and  new project ideas!

I will be at the Covington Hollydaze Bazaar on December 7, 2013. If you are in the South King County / North Pierce County area stop by my booth, Chee Chee and Company from 9:00am - 4:00pm.

Jenkins Creek Elementary School  
26915 186th Ave. S.E. 
Covington, WA 98042


~Connect with me ~ 

YouTube : HandmadebyKristen

Twitter: Handmadebykris


Web site: 
Chee Chee and Company

Facebook : Chee Chee and Company


Pinterest : cheecheeandco

Instagram : cheecheeandco

Twitter : cheecheeandco


October 25, 2013

Fuzzy wuzzy was a cryin'

 For Halloween this year I made my son a grizzly bear costume. He was given the choice of a bear or a lion because I had some left over brown fuzzy fabric gifted to me from my aunt. I finished it a few days ago but now he refuses to wear it. Negotiating with a two year old is not for the faint of heart. 

So... now I am trying to convince him it is just a sweatshirt since he will not even see the ears on the hood or the tail on the pants. So far he is smarter than I thought and will not fall for my games. If you want to make your own fuzzy animal costume here is what I did...


You will need:
Fabric - Enough to make to the size that fits (I used approximately 1 yard to make a 2T / 4T )
A pair of pants and a sweatshirt with hood to use as the pattern
Elastic
Scissors
Sewing machine or needle and thread
Felt -Optional

This project will take about 45 minutes to prep and assemble


After washing the fabric, fold in half then lay out pants and sweatshirt. Pin in place or chalk outline.

Cut out pattern and pin together until you are read to sew.

Pattern for hood and ears/tail
Inside of the back of the hood

For hood, cut two pieces for the side and then one center strip. Sew all together then add to shirt base. 

For the hood sides, make sure one is facing to the left and one to the right so the rounded side is the back of the hood.


To add elastic to the waist band of the pants and cuffs of shirt and / or pants, Fold the right-side in then sew seam with enough room for width of elastic. Leave 1/2 -1 inch opening to feel elastic through. Pull elastic all the way through and sew ends together. The sew closed seam.


I added felt to the tummy and inner ears. This is optional but can add some character to your costume.

For the tummy, round one piece of felt into a large oval. Pin in place then sew with a 1/4" seam allowance. I reinforced with a zigzag stitch for a second round.


For the ears and tail I just used a scrap piece of fabric (see pattern above). Cut 2 pieces for each ear and 2 for the tail. Sew together leaving bottom flat side open. You can stuff the ears to make them more full. I cut matching felt from tummy area to go onto the ears then reinforced with a zigzag stitch as seen here.


Once ears are ready you can cut a slit in the hood where you would like each to go. Insert ear and then sew each side of slit and ear together (see right).


***


I will break down my son sooner or later to wear that costume. If that later happens to come next year, I did add a 4 inch seam allowance so I can let out the length if needed. If you made a costume this year I would love to see your pictures or video!


~Connect with me ~ 


Facebook : Chee Chee and Company


Youtube : HandmadebyKristen

Twitter: Handmadebykris

September 22, 2013

Enjoying the season

I have gotten to a point in my adult life where I am trying to enjoy the season I am in and make the best of what I do have and the people I am sharing it with. I always struggle, but nothing worth working toward will be as sweet without a few hiccups along the way. Autumn is now here and we are still not in a house. We got close but it fell through after waiting for 3 months for a word from the bank. Frustrated, but kind of relieved. I was not in love with that house and now I know it was just not the right one for us. So we are still looking for a house and I have a goal to be in before the new year!

So with buying a house comes a lot of waiting. When I am waiting and get bored or anxious I tend to bake.I have not been feeling very creative lately for many reasons but still like to change things up a bit when I can. Most recently I had been making Zucchini bread, thanks to a lovely friend that gave me some awesome Zucchini. My recipe makes two medium sized loaves so we have been trying to get in the habit of eating one and freezing the other for later in the year. Good thing too because between my husband, son and I we can finish a loaf before it is even cooled.

I have gotten my recipe that way I like it now for the basic bread, so I have been trying to add things to it now. Raisin and walnuts are always good and most recently ginger. I use 1/4 cup dried pieces of ginger that have been cut up finely, then just stir into the batter before pouring into the pan. It is not too intense but adds a little kick to the bread. I highly recommend you try it!

Here is a link for my Basic Zucchini Bread  recipe to try for yourself. We also like to top with a little butter and or honey.

Enjoy!
~Connect with me ~ 


Facebook : Chee Chee and Company


Youtube : HandmadebyKristen

Twitter: Handmadebykris


August 07, 2013

Frozen Banana Treat - Revisited

If anyone reads my blogs regularly or happened to come across a blog I did on a frozen banana treat I am revisiting my original recipe and trying a new spin (link below). Since blackberries are in such abundance in the Pacific Northwest right now, I am always looking for a new way to use them. They are one of my families favorite berries and worth every little thorn to get them. You can buy them too to avoid the literal blood sweat and even tears, but I vowed to never buy something that grows wild in my own little part of the world.


Once you have your berries you can choose to separate out the seeds or leave the berries whole. If you have frozen berries you can add them whole with the bananas. If separating the seeds, you can pour about 1/4 - 3/4 cups of prepared blackberry juice into your bananas as you puree. This is also great with blueberries and strawberries.


Here is a link for my version of a non-dairy ice cream alternative:


~Connect with me ~ 


Facebook : Chee Chee and Company


Youtube : HandmadebyKristen

Twitter: Handmadebykris


August 05, 2013

Tropical Banana Bread

While grocery shopping I like to hit up the discount section in the back of the store. In some store there is also a produce area that has discounted fruits and vegetables. I lucked out one day, and found about 6 bunches of very ripe organic bananas for 50 percent of per pound. I am sucker for a good deal on things we use, so naturally I snatched them all up. 

Freezing is a great way to keep bananas that are on there last leg. I usually peel and cut up about 3-4 per freezer bag or vacuum seal bag. We like to use them for a frozen ice cream alternative (link below) or in a banana bread. Bored with my regular banana bread recipes and with a new, but slightly dented can of pineapple from the discount section, I made an alteration then made what I like to call a Tropic Banana Bread.

Left -  Tropical banana bread . Right - Original banana bread.


Tropical Banana Bread
   2 C Flour (1 C White, 1 C Whole Wheat)
1/2 C Butter (Soften)
1/2 C Brown Sugar 
   1 C Bananas Mashed
3/4 C Pineapple (Crushed and drained)
1/2 C Coconut (Shredded)
   2 Eggs (Beaten)
   1 t Baking Soda
1/4 t Salt

Sift flours, soda and salt together then set aside. Cream together butter, sugar and eggs. Once combine, add fruit and stir in flour mixture.

Pour into 9 X 5 loaf pan and bake for 45 minutes or until done in the middle. Let cool for 5 minutes in pan then remove and finish cooling on wire rack.


Here is a link for my version of a non-dairy ice cream alternative:


~Connect with me ~ 


Facebook : Chee Chee and Company


Youtube : HandmadebyKristen

Twitter: Handmadebykris

July 19, 2013

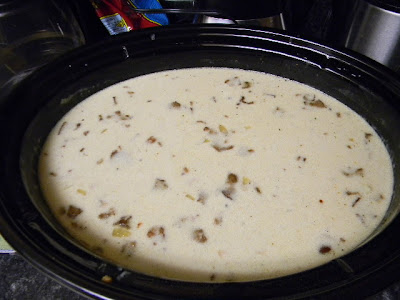
Bacon Clam Chowder

A few weeks ago, my Husband and I were able to spend some time just the two of us. It was nice to get away from the kids, our two year old and our dog, to just relax a bit. We honestly did not do as much relaxing as I had hoped but we did have a great time together. One day we went clam digging in Sequim, WA. If you are not familiar with Washington, it is on the upper edge of the peninsula boarding the Strait of Juan de Fuca just south of Victoria B.C. or more simply cold and wet most of the year. We managed to get enough Littleneck clams to make a double batch of clam chowder. This is all my husband's department because I really don't like shellfish. So here is his recipe for Bacon Clam Chowder!


Bacon Clam Chowder
60-80 Clams
      4 Large Russet Potatoes (Peeled and Diced)
      1 lb Bacon
      1 Large Onion (Diced)
      1 Pint Half-and-Half
16 oz Clam Juice (Bottled or use juice left from cooking clams)
      2 T Salt
      2 T Fresh Ground Pepper
      2 T Old Bay Seasoning


First you will need to clean the clams in cold water and then boil until they are cooked through. Once they open their shells they are done. You can take the clams out then scoop out the meat from inside. (You can add some extra seasonings at this point)

While the clams are boiling, peel and dice potatoes. Boil until tender but not falling apart then set aside.


Once all the shells are cleaned of the meat, you can discard.Cut the clams into bite sized pieces then set aside.


Cut bacon into 1/2" -1 " pieces then cook in frying pan. Set aside on paper towel to soak up any grease.


Drain all grease from pan except 2 tablespoons. Add the onion into the grease until onions soften and become translucent.

I large pot add half and half, clam juice and seasonings over medium heat until well combined. Add onions then gently stir in clams and potatoes. Bring to boil, time for 5 minutes. Yields about 12 servings.

You are now ready to eat! Serve with a light salad and bread or crackers.We hope you enjoy this chowder and would love to see your pictures and feedback about this recipe.


~Connect with me ~ 


Facebook : Chee Chee and Company


Youtube : HandmadebyKristen

Twitter: Handmadebykris


July 18, 2013

Cherry Pineapple Marmalade

This last week my wonderful husband surprised my with about 40 pounds of cherries he picked from a friend's property. I was planning on not doing anything aside from simply eating cherries this year to help cost costs so this was exciting and a little overwhelming all at the same time. I usually try to plan out what I am going to preserve for our food storage for the year to come at least a few weeks in advance. So after I got a stomach ache from eating too many, I decided I better figure out what we will do with the other 39 pounds.

I started by looking through my trusty Ball canning book circa 1966. It has some great recipes that are hard to find and tips for canning. I came across some cherry preserves and marmalade so I thought I would give it a try. Check out the video below on how to can Cherry Pineapple Marmalade.


For this recipe you will need:
2 C Cherries (I used 1 C Bing and 1 C Rainier)
2 C Crushed Pineapple
2 C Evaporated Cane Sugar

Measure out your sugar and set aside.

Pit and crush cherries into small pieces. (I used a food processor to pulse a few time)

Strain most of the juice from your pineapple and cherries.

In large pot, stir sugar into fruit then bring to a boil. 

Once your fruit has reached the boiling point time for 10 minutes.

Pour into hot jars, top with lids and rings then process for 10 minutes.

This recipe yields approximately five half pints. The Ball book stated that it would yield three half pints so I was a little surprised when it filled more. Next time I think I will try to get more juice out of the fruit before cooking to see if that makes a difference in the yield. Also measure the fruit when it is whole to see what difference that will make. Please let me know if you try this recipe and what you think! 
Thank you for reading and watching!

~Connect with me ~ 


Facebook : Chee Chee and Company


Youtube : HandmadebyKristen

Twitter: Handmadebykris


Toasted Coconut

I love using coconut in different foods and treats. We use coconut oil for just about everything in our house but I am still learning to work with actual coconut. We live in a place where they really don't grow so I don't get many fresh coconuts. The other part is that I don't know what I am doing, but then again I usually make things up as I go anyway. So from one maker to another, just go with it!

I have dried coconut in the dehydrator once before, but have never tried toasting coconut until now. You can click the Dehydrated Coconut link if you are interested to see how I did that. In order to toast your own coconut you will need a pan with edges, like a cookie sheet, and some coconut. I just got mine from the bulk section at my local grocery store. It was labeled as "unsweetened" shredded coconut.


Spread out the coconut in a thin layer across your pan. Use as much as you will be able to fit in your pan at one time without it being layered. Turn on your oven to a low bake setting. (I used 200 degrees Fahrenheit). You will need to keep a close eye on your coconut while it is baking because it can get too hot very easily due to the natural oils.

Place pan into oven for 10 minutes or until outer edges of coconut layer becomes a tan color. Remove pan then gently toss coconut. Shake pan to even back out and put back in oven for another 10 minutes. Repeat this step once more or until all coconut is toasted to your liking. Once done, let cool completely then use or store in glass container.


I used toasted coconut and almonds on my most recent batch of date rolls, they were delicious! Let me know if your try this method or if you have found another way that works for you!


~Connect with me ~ 


Facebook : Chee Chee and Company


Youtube : HandmadebyKristen

Twitter: Handmadebykris

July 04, 2013

Tie-Dye and Marbled Cookies

For the fourth of July we were invited to some friend's house. I had been asking my husband the last few days if there was anything we should bring. He kept saying no, but I was not satisfied with that answer so I kept asking.
Finally he asked them, or at least told me he asked them to shut me up, and they said cookies would be great. So I got to work 2 hours before we were leaving. Seeing as how it was a holiday after all, I thought I would be patriotic and make marbled and tie-dye cookies. Marble to stand for the pillars which hold up the capital buildings and tie-dye to represent the free spirit with in me and a country that gives me the freedom to write things like this blog.


Not really, I was just making up the design as I went along, but that sounded pretty good right? So to make these cookies you will need to make a rolled out dough cookie. I used a sugar cookie. If you need a recipe here is link to my Sugar Cookies. You will also need food coloring and a cookie cutter.


Prepare your dough and roll out according to directions. For tie-dye cookies blot food coloring onto the dough surface randomly then cut out cookies. 

***
You may want to sprinkle with some sugar to hide any odd taste from the coloring.
***

 For the marbled look you can just roll your left over dough back into a ball then roll back out. Once rolled out it should looked marbled because of the food coloring. You can do this same effect with separating the dough into two or more pieces and coloring each individual section. Then roll back into one ball and roll out flat to cut.


Bake cookies according to recipe and enjoy! Please let me know if you try this method. I would love to see your pictures!

~Connect with me ~ 


Facebook : Chee Chee and Company


Youtube : HandmadebyKristen

Twitter: Handmadebykris


June 29, 2013

Red, White and Blue dip

Do you ever go to a picnic or barbecue where you are not sure if people are in the mood for sweet or savory? Here is a patriotic dip that will please just about everyone! It is sweet when served with graham crackers and savory when served with a buttery or vegetable type cracker. Juicy blue berries and crisp peppers surrounded by a smooth spread.


Red, White and Blue Dip
  8 oz Cream cheese (Vegan or dairy)
  2 C  Blue Berries (Frozen or freeze fresh berries)
  1     Bell Pepper (diced or minced)
20 oz Can Crushed Pineapple Drained
  2 T  Honey
  1 t  Seasoning salt

Mix Cream Cheese with pineapple, seasoning salt and honey. Let set in refrigerator for at least one hour. Fold in blue berries then top with peppers and serve. Simple, quick and delicious! 

~Connect with me ~ 


Facebook : Chee Chee and Company


Youtube : HandmadebyKristen

Twitter: Handmadebykris

June 28, 2013

Hanger star wreath

Independence day is coming up quick. I figured I should decorate or something, so here goes. I have a Scentsy warmer that is star shaped but that was really it other then a flag. I happen to have some broken hangers that I never really know what to do with anyway. I usually end up just throwing them into the recycling bin. I had been think about making a star out of hangers on and off this week but never got around to it. After a frustrating day at work today I just needed to craft it out. So I cranked up some music and got to work.


To make a wreath like this you will need:
3 old hangers
Tape
Cutters for the hanger
130 strips of fabric (2" X 8")
Glue (Optional)


Start by preparing your points. Cut bottom line in half.


Cut off the top hook and any hanging pieces so you are left with 5 points. 


Tape center joints together.


Start tying fabric strips around the star you have made. It does not matter how you tie them. Just try to use the same method all the way around. I have used a basic hitch knot.


You can create a pattern of your choice with . When I was finished tying on the fabric strips I trimmed the longer pieces to make them as even as possible. You may need to use some glue to hold the fabric in place on the points if it slides.

I realized after doing two of the points that the hangers that are wider in the corners make it a little difficult to tie on the fabric. If you have the option of  hangers that are the same size all the way around it is best.

I am pretty pleased with how this star came out. It is really light weight and was easy to do. This would be a great project with kids and you can use the same method for just about any shape.

~Connect with me ~ 


Facebook : Chee Chee and Company


Youtube : HandmadebyKristen

Twitter: Handmadebykris

May 30, 2013

Let me see, me

I pray God lets me see.
From the warrior, to the war in her.
At battle with the passion for her own desires and of her family.

Friends,
Family, everywhere in between.
Inside out.
Out of place, drives her a little over.
Over, to another lesson.
In love with the life she is living.
She is a tightrope walker.
Balancing, the weight.
Shoulders tight, nose runny.
Illness is an ugly world.
Much like hate and loathing.
Fund to say, that is all...
That my life is all. May I see myself.
In you, through you, to you.
Balance that.
Grace, Love, Power.

Power of the one.
One who, is me.
I am, self.
I am determined to live.
For my desires are yours.
My passion, be you.
Or as close as I can be.
At the hem of your garment.
Sew with love. Create with honor.
Make the life I live be.
Meaningfully showing life with grace.
To be me.


~Connect with me ~ 


Facebook : Chee Chee and Company

Youtube : HandmadebyKristen

Twitter: Handmadebykris

May 28, 2013

Blackbean Hummus

When I get stressed out I try to keep breathing and be productive instead of wallowing in my own self pity. Lately my patience has been running on fumes and I have been struggling in the muck. Fighting my urge to just sit on the couch and get to sucked into whatever is on the screen, I made dip.
A hummus to be exact. I think it turned out really well and my son and I have been eating on it the last few days. It is officially kid test and mother approved.


To make this dip you will need...

1 C Black Beans (Canned is fine just drain and rinse)
1 C Chickpeas / Garbanzo Beans(Canned is fine just drain and rinse)
3 Cloves garlic
1 T Tahini (Recipe at bottom)
1/3 C Olive oil
1 Dried pepper minced or 1 T of red pepper flake (yours choice of heat)
Salt to taste ( I used about 1 teaspoon)


Once you have drained and rise beans, puree in food processor / blender with 1/2 of the oil. Once smooth add Tahini, pulse a few times then add remaining ingredients. Puree once more until everything is incorporated then serve with pita chips or veggies.

Tahini
1 C Sesame Seeds
1/4 - 1/3 C Olive oil

Toast sesame seeds until light brown. Add olive oil and puree until smooth.


~Connect with me ~ 


Facebook : Chee Chee and Company

Youtube : HandmadebyKristen

Twitter: Handmadebykris


May 19, 2013

Rules and regulations

This post is going to be a rant, if you don't want to read it I suggest you stop now. 

For those of you that don't mind here is what is going on in my life right now. My husband and I have been approved for a VA Loan, we have looked at over 30 houses and have been beat out by other offers three times now. We have found a house we love and it needs a lot of work. However we are completely willing to do all the work and are ready to pay full asking price and accept this house as-is. Due to restrictions from the approval process during VA appraisal it will never pass the inspection.

I am beyond frustrated right now. I understand that the VA is trying to do a service for our military families  to provide safe housing but I would think if you are knowingly willing to complete any unfinished work or repair you know what your getting into. 

I am trying very hard to look at this as a sign from God that this is not the right house for us. But the way the housing market is going and how fast "move in ready" houses are going, we are going to end up paying a lot more then we want. With that said, we are continuing to look at more houses today.  I pray that I will go into each house with a clear and level head and move on from the ones we will never get. I pray for confidence on our decisions and peace when we find the one god has in his will for us.

Aside from trying to find our new home, my husband is working three hours away during the week (at least he is working) and my son is going through some pretty wicked tantrums right now. I am not sure if my patience has ever been tested so much at once.

~Kristen

April 22, 2013

Earth Day Up-cycled Decor

I love home decor items that make a dull boring space seem more warm and inviting.So with that need in mind, and also my love for all things recycled and re-purposed, I have decided to liven up my bathroom. Not the most glamorous of places but hey, it needs some character!

Anyone who knows me can clearly see I have a obsession/problem with recycling. Not in a bad way, but I am sure my husband gets really annoyed with be always telling him, "uh... hun, that can be recycled". I just have a strong urge to do the best with what we have got and that means no excuses for disposal. If we can't use it, give it to someone or a place that can.


You will need:
Old Vase that you would otherwise get rid of
Rope or twine
Hot glue and glue gun
Ribbon or embellishments as wanted

Make sure your vase or container is clean and ready for your glue. You will be only putting it on the outside, so your vase will still be usable for flowers or what ever you would like to put in it. I just left mine empty but I may add something more at a later time.

You will need enough rope or twine to go around your container from top to bottom.

I started with one end laying glue down on the vase then pressing the rope into the glue all the way around. Once you have gotten back to the start, guide your rope just below the first round and start your second round. Continue this process all the way to the bottom of the vase.


***I found that using one piece and spiraling down the 
vase works better than cutting each round.***

Once you have gotten to the bottom of the vase you can overlap the bottom ring and tuck the tail under the row above to conceal the end.

You do not need to put glue the entire way around each ring. Just enough to hold in place. I also found that as you are gluing and wrapping the rope, press the rope up against the ring above to make a tight wrap.

If you need  a place to get rid of your old stuff but don't want to throw it away consider donating it to a second hand store, charity or use an online service to help you find a new home like Freecycle.

Let me know what Earth Day inspired projects you come up with or if there is anything you would like me to try. Happy crafting!


~Connect with me ~ 


Facebook : Chee Chee and Company

Youtube : HandmadebyKristen

Twitter: Handmadebykris

April 18, 2013

Father's Day Treats

This year for father's day my son and I are making his favorite cookie (Shortbread) with a little piece of us in it. The shortbread is a family recipe, raspberry jam made fresh last June and my son's hand print.


To make your own, make up a batch of a cookies that can be rolled out like a sugar cookie. Roll a ball of dough about golf ball sized then gently smash almost flat. Press child's hand down to leave imprint then fill with jam. Bake as directed in recipe. Finished cookie will be about 3-4" in diameter.


 ***Jam will be very hot when it first comes out so let cool before eating***

Size of dough ball may need to be altered depending on child's hand size. Try it out this Father's day!


Here is a link to a couple cookies I have made that will work for this project:
Mmm...cookies!


~Connect with me ~ 


Facebook : Chee Chee and Company

Youtube : HandmadebyKristen

Twitter: Handmadebykris

April 16, 2013

Bison Tacos

I am always trying to make new foods for my family. I came across some ground bison recently at the grocery store. We have had it before but it is not usually on the forefront of my mind when shopping. I like bison for its great taste and low fat content.This recipe was never really intended for a blog but it turned out pretty darn good so my husband encouraged me to write a little something about it.


Bison Tacos

1lb Ground bison
1-2 Large Sweet potato
1 1/2 C Quinoa
1 C Water
3 Cloves Garlic
1/4 C Green onion (optional)
3 T Coconut Oil
Salt and Pepper to taste

Rinse quinoa, Add to pot bring to boil on med/high heat with the water. Cover with lid a reduce heat to low for 15-20 mins or until tender.


Peel and dice sweet potato then steam until tender. (About 8 mins)


In large pan brown bison with garlic and fresh ground pepper and salt. Drain any fat then add sweet potatoes, oil, quinoa and onion.


Fold together and serve on warm tortillas. Garnish with additional green onion if desired. 


Serves four adults.(Three small tortillas is about one serving depending on how full you fill each one.)

Try bison out and let me know how you like it. If you have any ideas for using bison please share here. I hope you enjoy!


~Connect with me ~ 


Facebook : Chee Chee and Company

Youtube : HandmadebyKristen

Twitter: Handmadebykris